


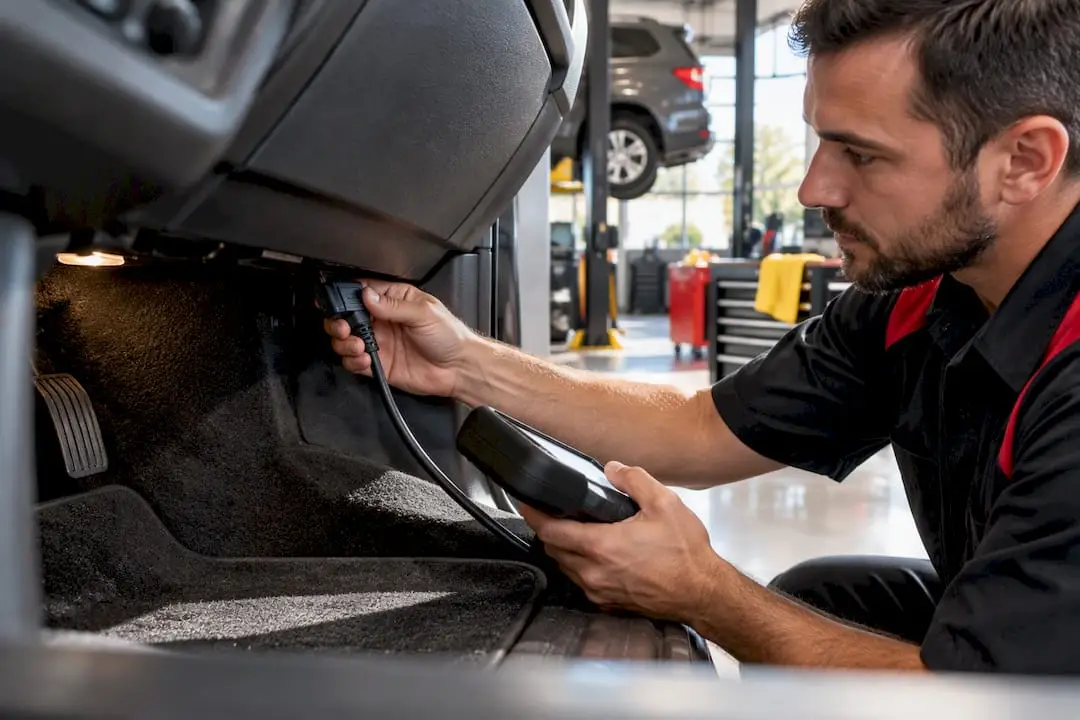
A car diagnostic test connects to your vehicle’s onboard computer to pull stored trouble codes and live data from its sensors and modules, showing us what’s happening under the hood right now. You need one whenever the check engine light comes on, when your car feels off but you can’t pinpoint why, or before buying a used vehicle. Expect the process to take anywhere from a quick code read to a longer visit involving a full inspection and road test.
TL;DR:
- A diagnostic test links to your vehicle’s onboard computer to retrieve stored trouble codes and live data, helping identify issues when the check engine light comes on.
- A code alone rarely identifies the exact failed part, requiring live-data review and physical inspection for an accurate diagnosis.
- Technicians use live data to distinguish sensor problems from mechanical faults, and addressing the most likely root cause can prevent unnecessary parts replacements.
- Full diagnostics typically take about an hour, including a road test, visual inspection, and a detailed report, with costs rising depending on complexity.
- Confirming the cause with live data before repairing prevents owner overspending on parts that do not fix the actual problem.
Table of Contents
- How a diagnostic test works: OBD-II, ECUs, and trouble codes
- Which systems get checked and what problems turn up
- What the check engine light really tells you, and where it falls short
- DIY code reading vs professional diagnostics: who should do what
- Typical cost, time required, and what’s included in a diagnostic visit
- What happens after the test: your report, estimate, and next steps
- Why a certified shop matters for accurate diagnosis
- How to prepare your car for a diagnostic test
- Common symptoms that signal you need a diagnostic test
- Where diagnostic tests fall short and when to dig deeper
- How to interpret and prioritize multiple diagnostic trouble codes
- Generic codes vs manufacturer-specific codes: what’s the difference
- Safety precautions during a diagnostic test
- What we think most owners get wrong about diagnostics
- Get a professional diagnostic at Kwik Kar of Celina
- Sources
- FAQ
How a diagnostic test works: OBD-II, ECUs, and trouble codes
Every vehicle sold since model year 1996 carries a standardized system called OBD-II, short for On-Board Diagnostics, second generation. This system was mandated as part of federal emissions rules, and it monitors your engine, transmission, and emissions controls continuously while you drive, according to an EPA news release on OBD systems.
Here’s the basic process. Your car’s computers, called ECUs (electronic control units), gather information from dozens of sensors: oxygen levels in the exhaust, engine temperature, airflow, fuel trim, and more. When a reading falls outside its expected range, the system logs a Diagnostic Trouble Code, or DTC, and often turns on your check engine light, known formally as the Malfunction Indicator Light.
That light is your car’s way of raising its hand. It doesn’t tell you exactly what’s wrong; it tells you that something crossed a threshold the computer was watching.
- The ECU collects sensor data in real time, comparing it against expected ranges.
- A DTC is stored once a reading breaches that threshold, often triggering the check engine light.
- A technician plugs into the OBD-II port to retrieve those codes and review live data.
A stored code points us toward a subsystem, not always the exact failed part. That’s why a full diagnosis often needs live-data review and a hands-on inspection to confirm what the code is actually describing.
Which systems get checked and what problems turn up
A diagnostic scan touches nearly every electronically monitored system in your vehicle. That breadth is exactly why two very different problems can trigger the same warning light.
- Engine and fuel systems: misfires, failing oxygen sensors, and mass airflow (MAF) sensor faults are among the most common finds.
- Emission controls: the scan flags issues with the catalytic converter and related sensors that keep your car within emissions standards.
- Transmission, ABS, and airbag networks: these systems each report their own codes when a sensor or module misbehaves.
- Electrical and wiring faults: loose connectors, corroded grounds, and failing relays often show up as intermittent or hard-to-pin-down codes.
Sensor problems and mechanical problems tend to look different once you dig into the live data. A failing sensor often reports a value that jumps around erratically or sits pinned at an extreme, while a genuine mechanical fault, like a worn spark plug causing a misfire, shows a pattern that repeats consistently under certain driving conditions. Reading that difference correctly is part of what separates a quick code pull from a real diagnosis.
What the check engine light really tells you, and where it falls short
A trouble code is best thought of as a symptom marker. It tells you which circuit or system reported the problem, but it rarely names the exact part that failed.
- A steady check engine light usually means you can drive carefully to a shop soon, though you shouldn’t put it off indefinitely.
- A flashing check engine light is a different story: it often signals an active misfire that could damage your catalytic converter, and it calls for prompt attention.
- Either way, the code itself is a starting point for a technician’s investigation, not a final answer.
Consumer Reports draws this same distinction, recommending that drivers treat a flashing or red warning light as an emergency while a steady amber light still needs timely diagnosis, according to its guide to dashboard warning lights.
A code labeled “P0455” might mean nothing more than a loose gas cap, or it could point to a more serious evaporative emissions leak. The number alone doesn’t tell you which. That’s also true of codes tied to misfires or catalytic converter efficiency: the same code can stem from a worn spark plug, a failing coil, or a downstream sensor issue. Guessing at parts based on the code alone, and replacing them one by one, often costs more than paying for a proper diagnosis up front.
DIY code reading vs professional diagnostics: who should do what
A basic OBD-II reader or a free scan at an auto parts store will tell you which code is stored and give you a general description. What it usually won’t do is confirm the actual cause, since that takes live-data interpretation and physical testing that a handheld reader can’t perform on its own.
Professional diagnostic service goes several steps further, as detailed in Diagnostics Van Alstyne TX – Check Engine Light Repair Near Me. Technicians log live data over time, run pressure and voltage tests on specific components, take the vehicle on a road test to reproduce the symptom, and visually inspect wiring, hoses, and connectors before recommending any repair.
- Free store scans work well for a quick check when a light first comes on and you just want to know the general area of concern.
- Professional diagnostics make sense once symptoms recur, worsen, or involve multiple systems at once.
- Certified technicians verify a code’s meaning with tests rather than replacing parts based on the code number alone.
AAA’s code translator resource notes that code readers offer useful clues, but confirming the root cause still depends on a technician’s testing and judgment.
Pro Tip: Ask your shop for a written copy of the diagnostic findings, including the live-data readings, before you approve any repair.
Typical cost, time required, and what’s included in a diagnostic visit
Diagnostic pricing varies by shop and by how deep the investigation needs to go. A simple code read takes only a few minutes, but a full diagnostic, one that includes live-data monitoring, a road test, and a physical inspection, often takes approximately an hour depending on the symptom.
What’s typically included: a code scan, a review of live sensor data, a basic visual inspection of related components, and a written estimate describing what was found and what it would take to fix it. Free scans at parts stores usually stop at the code read and skip the live-data work and inspection that confirm the cause.
- A quick code pull: a few minutes, often free or low cost.
- A full diagnostic with road test and inspection: often an hour or more of shop time.
- What’s included: code scan, live-data review, inspection, and a written estimate.
Repair costs have risen in recent years, which affects the final bill once a diagnostic identifies needed work, according to recent reporting on rising repair prices. That trend is worth keeping in mind when comparing an estimate to what you might have paid a few years back.
What happens after the test: your report, estimate, and next steps
A solid diagnostic report gives you more than a code number. It should include the stored codes, the live-data readings that support the technician’s conclusion, notes on what was physically inspected, any recommended follow-up tests, and a written cost estimate.
From there, a good shop turns that information into a prioritized repair plan, tackling safety issues first and flagging anything that can reasonably wait. Before you approve work, it’s worth asking a few direct questions.
- Ask whether the fix comes with a warranty and how long it lasts.
- Ask whether parts are new, remanufactured, or aftermarket, and what that means for cost and longevity.
- Ask for the estimated labor time so you understand how the price was calculated.
- Ask if there’s a less expensive alternative fix worth considering first.
If a diagnosis and estimate feel off, especially for a major repair like an engine or transmission, a second opinion from another certified shop is a reasonable step before committing.
Why a certified shop matters for accurate diagnosis
Diagnostic accuracy depends heavily on who’s reading the data. ASE-certified technicians have passed testing on specific vehicle systems, which matters when a code could point to several different underlying causes.
Every diagnostic is backed by a few concrete protections for drivers.
- Technicians handle the diagnostic work, pairing training with the tools needed to interpret live data accurately.
- Digital Vehicle Inspections give photos and notes documenting the findings, so you get clear documentation.
- A warranty backs completed repairs, reducing risk if a problem resurfaces.
- After-hours drop-off and a ride service make it easier to fit a diagnostic visit into a busy week.
That combination of documentation and warranty coverage is designed to keep the process honest from the first scan to the final invoice.
How to prepare your car for a diagnostic test
A little preparation helps your technician get to the answer faster and can even save you money on shop time. Before you head in, take a few minutes to gather information that won’t show up on a scan.
Write down when the check engine light first came on and whether it’s steady or flashing. Note any symptoms you’ve noticed: unusual noises, rough idling, hesitation when accelerating, a burning smell, or fluid on the driveway. Mention if the light appeared right after a repair, an oil change, or filling up with gas, since timing can be a useful clue.
Bring your vehicle’s maintenance history if you have it, especially records of recent repairs or parts replacements. If you’ve had the same code before, mention that too. It helps a technician know whether this is a new issue or a repeat problem that wasn’t fully resolved.
Avoid clearing the code yourself before your appointment. Once a code is cleared, some of the supporting data goes with it, which can make it harder to confirm what triggered the light in the first place.
Finally, try to describe the conditions under which the symptom shows up. Does it happen only on cold mornings, only at highway speed, or only when the AC is running? Small details like that often point technicians toward the right system faster than the code alone.
Common symptoms that signal you need a diagnostic test
The check engine light is the most obvious trigger, but it’s far from the only sign that your car’s systems are asking for attention. Several everyday symptoms are worth a diagnostic visit even without a warning light.
Rough idling or stalling at stops often points to fuel delivery or ignition issues that a scan can help narrow down. Noticeable hesitation or a loss of power when accelerating can indicate anything from a clogged fuel filter to a failing sensor feeding bad data to the engine computer.
A sudden drop in fuel economy, unusual smells like burning oil or rotten eggs, or a rough transmission shift are all worth a look. So is a car that fails a state emissions test, since that’s often the emissions control system flagging exactly what a diagnostic scan is built to find.
Strange noises deserve attention too, particularly if they show up alongside a dashboard warning or a change in how the car drives. On their own, noises point more toward a mechanical inspection, but paired with a symptom like reduced power, they’re a good reason to get the onboard computer checked as well.
If more than one of these symptoms shows up at once, that’s often a sign the issue involves more than a single sensor, and it’s worth having a technician look at the full picture rather than guessing at one fix.
Where diagnostic tests fall short and when to dig deeper
A diagnostic scan is a powerful starting point, but it has real limits. Codes reflect what the computer is programmed to watch, which means a mechanical problem that doesn’t trip a sensor threshold, a worn belt, a cracked hose, or a weak motor mount, can go completely undetected by a scan alone.
Intermittent problems are another challenge. If a symptom only shows up occasionally, the code might not be stored yet, or it might describe a condition that isn’t currently present during the test. That’s part of why a road test and a visual inspection matter as much as the scan itself.
Multiple systems interacting can also confuse a straightforward code read. A weak battery or a corroded ground, for example, can throw off readings across several unrelated sensors, making the problem look more complicated than it is until someone checks the electrical basics first.
When a scan doesn’t turn up a clear answer, or when the symptom persists after a suggested fix, that’s the point to ask for further inspection: pressure testing, a smoke test for vacuum leaks, or a deeper look at wiring and connectors. A code-only approach without that follow-up testing is where a lot of unnecessary parts get replaced.
How to interpret and prioritize multiple diagnostic trouble codes
It’s common for a scan to return more than one code at once, and the order they’re read out isn’t necessarily the order they should be fixed. The first step is separating safety-related codes from ones that affect performance or emissions but don’t put you at immediate risk.
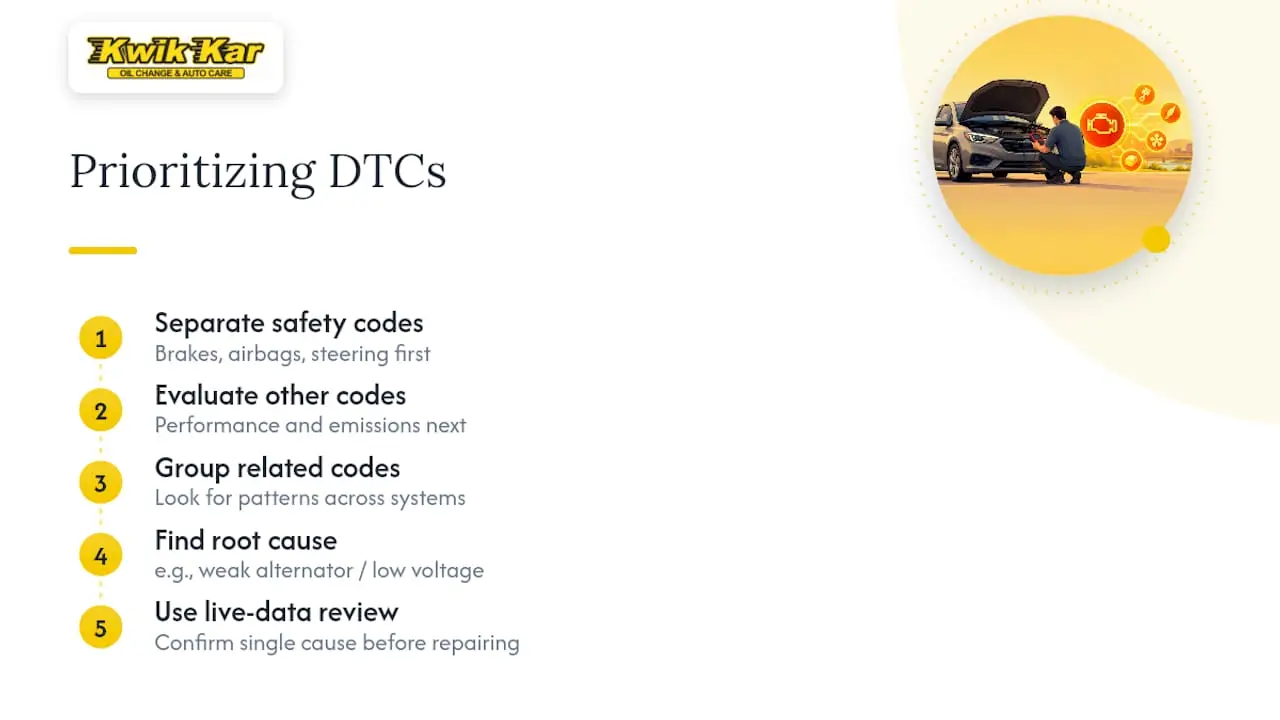
Codes tied to braking systems, airbags, or steering should generally take priority regardless of what else shows up. After that, look for codes that might be related to each other. A single root cause, like a weak alternator, can trigger several seemingly unrelated codes across different systems, since low voltage affects sensors throughout the car.
A useful approach is to address the most likely root cause first rather than chasing each code as a separate repair. If a technician sees a pattern suggesting one underlying issue, fixing that often clears multiple codes at once, saving you from paying for repairs that were only symptoms of the real problem. This is another place where live-data review earns its cost: it helps distinguish a single cause with several symptoms from several genuinely separate issues that happen to surface together.
Generic codes vs manufacturer-specific codes: what’s the difference
Diagnostic trouble codes come in two main types. Generic codes, sometimes called P0 codes, are standardized across all manufacturers under the OBD-II system, which means a P0301 misfire code means the same basic thing whether you drive a sedan or a pickup truck.
Manufacturer-specific codes, often starting with P1 or other variations, are defined by the vehicle’s maker rather than the OBD-II standard itself. These codes tend to point to more detailed or proprietary systems, and interpreting them correctly sometimes requires manufacturer-specific software or reference data that a basic generic scanner doesn’t include.
This distinction matters when you’re comparing a free parts-store scan to a professional diagnostic. A basic reader may only capture the generic code and description, missing manufacturer-specific detail that would narrow down the cause faster. Shops with access to manufacturer-level diagnostic tools can often get a more precise read, particularly on newer vehicles or those with more complex electronics, like many European models.
Safety precautions during a diagnostic test
A diagnostic test itself is low risk, but a few precautions matter, especially if any part of the process involves the engine running or the vehicle moving.
Make sure the vehicle is parked on level ground with the parking brake engaged before any work begins, particularly if a road test is part of the process. If the engine needs to run during the scan, this should happen in a well-ventilated space, since a running engine produces carbon monoxide that can build up in an enclosed area.
Technicians should keep hands and tools clear of moving parts like the fan and belts whenever the hood is open and the engine is running. If the diagnostic uncovers a fuel system issue, extra care around open flames or sparks is warranted given the flammability of fuel vapors.
For pre-purchase inspections or if you’re present during testing, it’s reasonable to ask the shop about their safety procedures, particularly for road tests. A reputable shop will have no issue explaining how they keep both the vehicle and the people around it safe during the process.
What we think most owners get wrong about diagnostics
The biggest misconception we see is treating a diagnostic code like a diagnosis. It’s a clue, and a good one, but owners who walk into a parts store, read a code off a free scanner, and buy a part based on that number alone often end up paying twice: once for the wrong part, and again for the repair that actually fixes the problem.
The conventional advice to “just Google the code” isn’t wrong exactly, but it skips the step that matters most: confirming the cause with live data and a hands-on look at the car. A code can have three or four plausible explanations, and only testing narrows that down.
If we could get owners to prioritize one thing, it would be this: ask for the live-data evidence behind a recommended repair, not just the code number. That single habit does more to prevent unnecessary spending than any amount of code-lookup research, and it puts the burden of proof where it belongs, on the diagnosis, not on your wallet.
— Kwik Kar
Get a professional diagnostic at Kwik Kar of Celina
When your check engine light comes on or something feels off, you deserve a diagnosis you can trust, not a guess. Technicians pair OBD-II scanning with live-data review and a Digital Vehicle Inspection, backed by a warranty on completed repairs.
Schedule a visit through our diagnostics services page, and bring along your vehicle’s history and a note on when the light first appeared. It helps us get you answers faster.
Sources
- EPA news release / background on OBD systems
- What the dashboard warning lights mean in your car — Consumer Reports
- AAA Onboard Diagnostics / code translator
- Car repair prices are soaring — CNN Business
FAQ
How much does a diagnostic test cost for a vehicle?
Cost varies by shop and by how deep the diagnostic needs to go, since a simple code read costs far less than a full diagnostic with live-data review and a road test. Ask your shop for a written estimate before work begins so you know exactly what’s included.
What is included in a car diagnostic test?
A thorough diagnostic test includes a scan for stored trouble codes, a review of live sensor data, and a basic visual inspection of related components. A full report also includes technician notes and a written estimate for any recommended repairs.
How much does it cost to put a car on a diagnostic test?
Pricing depends on the depth of the test, ranging from a quick code pull to a longer visit involving live-data monitoring and a road test. Shops typically provide a written estimate up front so you can see the cost before agreeing to any work.
Will an auto parts store do a diagnostic for free?
Many auto parts retailers offer free code reads using tools like AutoZone’s Fix Finder, which can quickly identify a stored trouble code. These free scans are useful for a first look, but they typically don’t include the live-data review or physical inspection needed to confirm the actual cause.
What’s the difference between a check engine light that’s flashing and one that’s steady?
A flashing check engine light often signals an active problem, like a misfire, that needs prompt attention to avoid further damage. A steady light still needs diagnosis soon, but generally allows for careful driving to a shop rather than an immediate stop, according to Consumer Reports.